Showing posts with label DIY. Show all posts

Thursday, August 1, 2013

HOW TO: Avoid Shaggy Hair!

Hey guys,

Short blogpost!

I'm just giving you a tip how you can keep your hair in better shape if you have fuzzy curly hair that tends to look like mine when I do a ponytail. I call them my little antennas. So today you'll find out a secret of mine.

BEFORE


AFTER


 My secret weapon!!!!!


Yeah, this is really a toothbrush! I once read about this tip in a fashion magazin and had to try it out. And ever since then I can't imagine how I did it without it. You basically just spray some hair spray on the brush and then brush through your hair. You can of course spray it on to your hair and the brush through, it turns out the same. You can use an old toothbrush that you don't feel like using anymore for your teeth (I change mine every 3 months - also recommanded this way) or buy a new one only for the hair. Up to you!!!! 
You can also spray your hair and then go with your tangle teezer over it ;) works good too.
Have a great day!

XoXo
Irsada

Tuesday, October 30, 2012

DIY - Pimped up Sneakers! :)

Hiiiiii girls,

Here I am again with a new post! If feels like I didn't do a post in a while althought the last one was last week but still it feels like I didn't show you something interesting but hopefully you don't mind. I was pretty busy the last 2-3 weeks. I had lots of ideas in my head what I could show you in the next days/weeks but not much time and then there was another problem with my internet connection which seems not to work right as it takes half an hour to upload one picture on blogger… so you can imagine how I felt to do new posts. But I took lots of pictures yesterday and so the ideas will be turned into posts asap ;) 

In today's post I will show you how I pimped up some sneakers I bought last year, for about 9,99€ at the german store DEICHMANN, with some studs to make them look cooler! 

This is how they turned out:


The comparison before and after:


Excuse me if they look dirty! But isn't that what real sneakers should look like if you're cool ^^


So I used three different types of studs that I bought together as one package, on ebay for about 10-12€, which you can see in the next pictures.

Front:


At the back:


So go get some studs and pimp your clothes up ;) It doesn't have to be shoes, you can put them on shirts, jackets, pullovers,... whatever you want!

Sincerely,

Irsada

Wednesday, October 24, 2012

Do It Yourself - Scarf

Heeey hooo,

it was about time for some DIY ideas! So today I'm showing you how to a skirt out of a scarf and do a cool scarf out of a t-shirt . I already posted a DIY picture of how to make a skirt out of a pullover some time ago so today it will be a skirt out of a scarf ;)

 
Unfortunately, I can't get this picture bigger than this :O


If you have some cool idea let me know! ^^

IrSaDa

Wednesday, September 26, 2012

How to fix your broken blush/powder! :)

Hey girls,

today I wanted to show you how you can easily fix a broken blush or powder if you want. For this occasion I'm using my Benefit Coralista blush... Noooo, I didn't break this on purpose. I think it was my mother who didn't pay attention while she was cleaning in my room and then dropped it from the shelf -.-" No wait, I'm pretty sure she was it, this could never happen to me... But it doesn't matter anymore. Now I have a good reason to do this post!!!! ;)

So here you can see the way it looked like when I wanted to use it, opened it and found it like this:


No time to cry. And no need. But what you need is...
 
YOU NEED:


Most importantly alcohol!!!!! I bought this one by Hansaplast which has 70% of alcohol and it works the best way when you use pur alcohol like something like this. You can buy it at every big store, drugstore or at the gas station but if you don't find anything like this you can use schnapps with lots of % of alcohol. It doesn't have to be like 70%, I think even 15-20% are enough. I tried this once before with a schnapps and it worked! You also need toothpick or something else like a little spoon, I went with a toothpick as you can just trow it away after use. Also, you need a crepe papper (it doesn't have to be a Hello Kitty papper as I used ;P) and you need some object for the stamping part. As my blush is in a cube form I went with a nail polish that has a cube bottom.

FIRST: You have to break the blush even more until it looks like this!


SECONDLY: You should take all the pigments out of the form and put on a plastic bag.


THIRDLY: You can now add some of the alcohol, I used like almost a whole stopper and then you have to mix it with the pigments until it looks like this. All the pigments have to be wet in fact!!!


FOURTHLY: You put it all back into the form and spread it evenly!


FIFTHLY: You have to put the crepe papper over it and stamp with your stamping object all over it. In every corner! This step is the most important step as it depends on your stamping skills the way it will turn out/look like after. So make sure you do it right by taking some time for this step ;)


The crepe papper will absorb some of the alcohol already at this process and it will protect your stamping object from getting dirty. You will have to use it more than once, use the clean corners or another new crepe papper. I used 3 or 4 for this blush.


THE RESULT:

Tadaaaaaaaaaaaaaaaaaaa… Like new!


I stamped the pigments at the end a bit together with my ring finger to really make sure it's all pressed together and even. And here below you can see a close-up of the result ^^


HOW IT WORKS? Well if you are afraid of the alcohol ruining your blush/powder you don't have to be! The alcohol will evaporate after some time, so I suggest you to just leave your blush/powder open a few hours/a whole day/over night and it will all disappear and so will the smell of it of course too! So in fact it will be just like before ;)

BTW: don't forget to clean your blush brush! Lots of people don't do this or forget it. Just a little reminder ;)

Just to compare the broken and fixed blush:


Doesn't it look like new? :D
Didn't I tell you there is no need to cry for?
Did this help you in any form?

Just let me know by leaving a comment ;)


ARRIVEDERCI

IrSaDa

Thursday, September 13, 2012

DIY brush holder and more!

Bonjour/Bonsoir mes amis,

I made a brush holder for some of my brushes that I didn't buy in a set and also because I was sometimes desperate because I was taking a brush out of my real techniques brush holder but when I was in a rush I didn't have the time to put it right back from where I took it, which can be sometimes a real pain in the ass. So that's another reason why I decided for a solution that can make me throw my brushes fast on a safe place without wrecking them ;)

This is what I came up with!


What I needed:


You need a container, mine is out of glass and pretty heavy which make him stay where I place him and it doesn't move at all but I'm sure it works also with one of plastic. It can also be a vase with a similar form, square or round, just large enough to have enough space for the brushes but of course this depends on how many you have ^^ and you also need some decoration stones. Normally you should able to find both at the same store. I bought my touls at CASA. And yes the stones had to be in purple lol (purple freak) but of course you can use the color you want, and the stones can be even smaller or thicker, you should just check at the store if you can put a pen in the stones and if it stands straight! ;)


Also make sure you don't make a mess by putting the decoration stones in the container!

Maybe you could give me an idea what I could do with the 3 empty bottles of the stones? I still don't have any…


And here is my whole beauty corner, well at least the top of it where I have my brushes, my chains, bracelets and rings, …


And I also wanted to share this DIY ring box instruction picture which I really liked and maybe gonna try to make if I find a beautiful box ;)


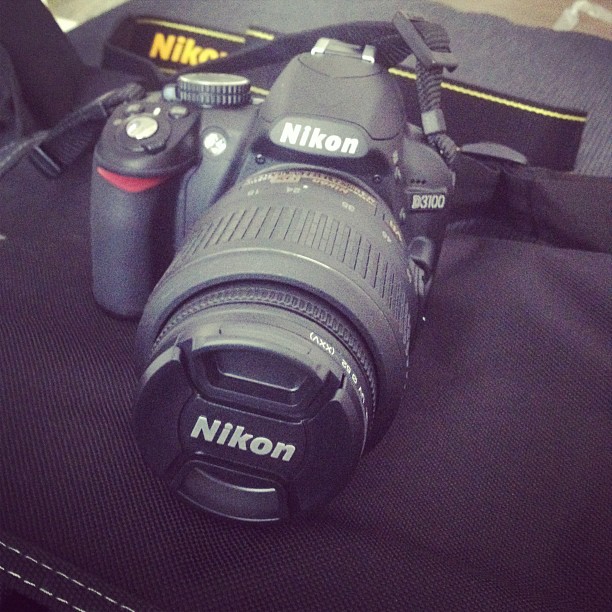
BTW here it is! My new camera wooohoooooooooooooooooooo I bought a Nikon D3100 and the pictures turned out all great so far :D


Also, there will be a new giveaway up in the next days because I'm soon gonna celebrate my 1 year blog anniversary :D So stay tunned and don't forget to subscribe!!!!!


Goodnight and sleep tigh,

XoXo

Irsada

Tuesday, September 4, 2012

DIY skirt!

Girlz,

I found this picture in the world wide web and really love the idea!!!!

Unfortunately I don't have a pullover with such a big opening/décolleté, to try it out myself but I know what to put one my shopping list for the next time. and I hope it inspires you to try it and maybe post it under here :D


Can't give any credits so that's it for today! ^^

Xo

Irsada

Wednesday, July 18, 2012

Trendy T-shirt - Do it yourself!!!

Hey Fasionistas!

I decided that I need to do more posts about fashion and clothes, so let's start with a little trick to fast get a trendy top from a normal basic t-shirt :)


I hope this was kind of a help for you or gave you some inspirations of changing some of your clothes. Make something new out of something old and be creative ;)

Read you soon again!

Sincerely,

IrSaDa